Yes, the Title was on Purpose
Honestly, I did quite a lot of small and various things this week. I’ll attempt to go over them - but expect a confusing mess of design, code, and redesigning! I just don’t know how to create an interesting cool and quirky title to summarize everything.
Animations
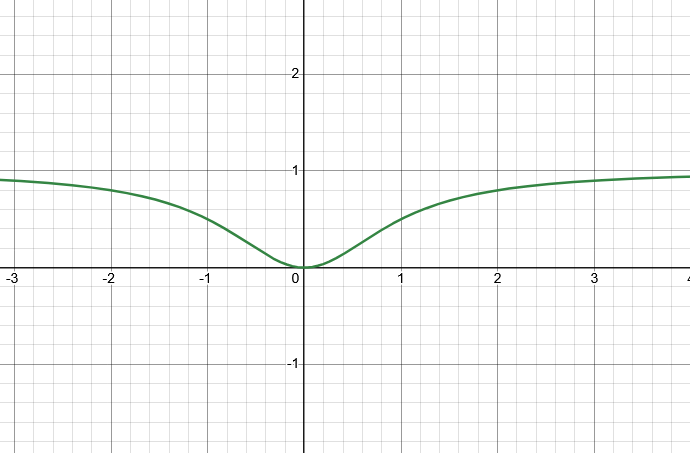
The first main thing I set up are animations. These are triggered and played by creating an AnimationFramework class, then providing it the specific parameters you’d want for the animation. The game attempts to run, on average, at a speed of 20 frames per second for these animations. This may sound slow in the world of 120 frames per second, but you must remember these are spritesheet animations. With each frame being drawn by hand, it is important not to overwork yourself just to get to 120! I mean, if you want to expand a 20 frame animation that runs on 30 fps, you’ll have to expand those 20 frames to 80. Doing that for every animation? No sir!
Also, I am glossing over the obvious point that camera frames-per-second is not the same as animation frames-per-second. The main reason low frame rate feels so bad is because the game overall feels unresponsive. Low frame rate animations can be extremely stylized.
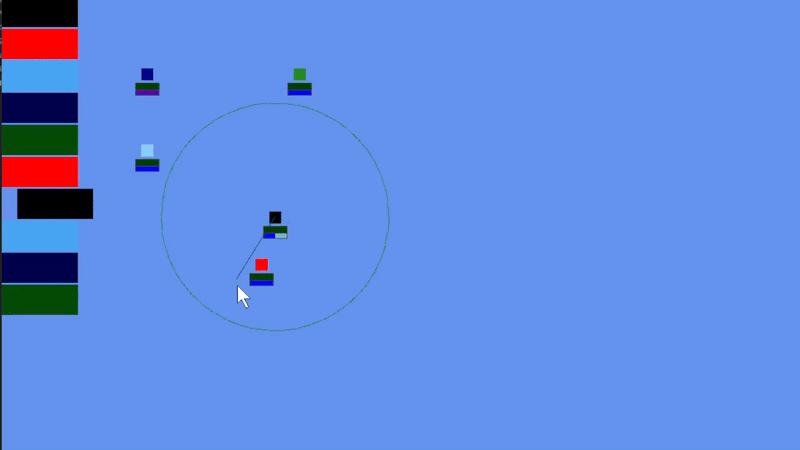
Anywho - I’d rather not ramble on about topics I’m not an expert in. I mean - I didn’t even create the test animations or have rights to use them for a final project! I’m merely using them for tests, they’re from RPGMaker MV and the whole credit goes to them for creating them. Regardless, it’s very helpful to start implementing my own animation system. Here! You can see it working in action with Eclara’s lovely Umbral Dash:
As mentioned before, the way animations work is pretty simple. However, it currently is very, uhm, tight. What I mean is that it’s not very scalable in my current opinion.
Let me try and explain why.
So, let’s take the example of Eclara’s Umbral Dash. The AnimationFramework class needs to know what about what it’s trying to portray - frame size, texture location, draw position, etc. The interaction looks something like this:
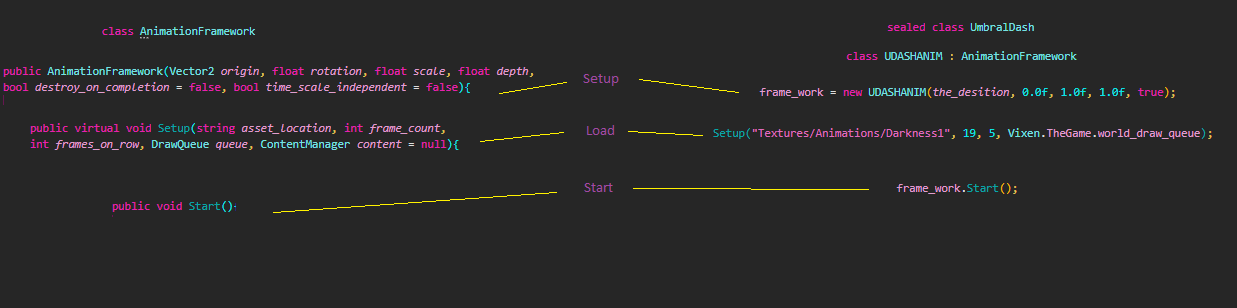
This may be a bit confusing as to why there’s three seperate steps in running the animation, but let’s forgo even that for now. The bigger issue that this works great for single animations - but what about when you have multiple texture files? How do you handle those?
This just means I’m going to need to rethink my current animation system. It’s not very well implemented at the moment. I will probably need an AnimationController class that actually handles AnimationFrameworks.
Regardless! The AnimationFramework is pretty powerful already. You can see that we can stall and loop animations before finishing them through Alata’s Comatose:
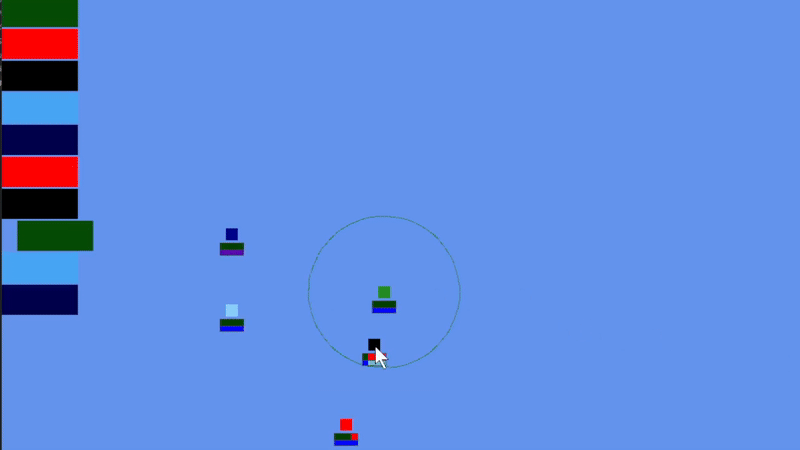
And yes, I shared these two character bio’s first because I wanted to share these specific animations. You’ll notice that the board and timeline has grown! And we’re now targeting a red character! This is setting up for what I think will be two weeks from now: the AI (scary!!!).
I see Mana Bars!
And yes! That is another thing I worked on! You’ll also notice that there is one character that has a mana bar not like the others:
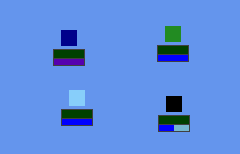
That character is named Lyscander. There is a special reason he doesn’t use mana. I will share that once I share his bio! (You may also notice that he is the one who said the quote in the Eclara Bio)
Anywho, having him here really helped me implement the secondary resource stuff. He uses his a bit differently than traditional mana, which meant that I immediately had to make mana more abstracted into a secondary resource. This is what allows me to make them different colors - it also allowed me to include Health Bars as a resource to remake the GUI super easily.
Skills, however, needed to be overhauled to actually use mana (you can see how skills use mana in the previous gifs). This actually wasn’t too hard, I just needed to change how to check if the skill is castable. This relies on two things: Resource availability and Action availability. You might recall that different skills can be done under multiple different actions and it changes the skill’s effect. In terms of mana cost, it doesn’t change anything.
Mana honestly wasn’t that difficult to set up - but it did lead to me completely restructuring the Skill set up. The main thing is that I removed all Keybinds, as they are no longer intended to be casted by keys. This had a reverberated effect on things that listened to hotkeys (basically just the controller).
Damage!
WARNING MATH SCARY MATH
The last main thing I did this week was damage. I’m not 100% set in stone on how this works, but basically the formula is as follows:
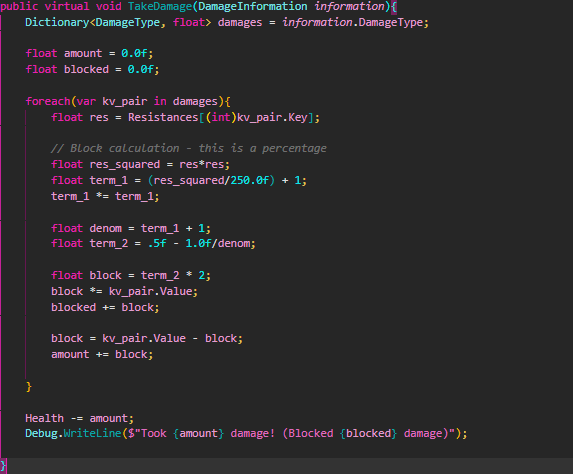
The gist of it is that you want to do the following formula:
For clarifications on the variables, d is the overall percentage of the damage that the character will take, dt is the damage type of the incoming damage, and r is the character’s resistance.
Now, Noellva, you may ask, how the fuck did you come to this conclusion to use this crazy formula? Well, it’s simple algebra really - pay attention in school kids! Regardless, let me go over it.
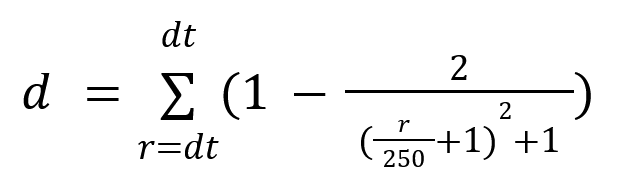
The main thing I wanted was to use a percentage because it’s a lot easier to control than an unexpected and unknown range of variables. It also helps because it’s easier to balance. Now, the thing about this was that I did not want total damage reduction to actually be possible. This meant that I had to find a function that had a limit of 1. If you don’t know what that means and are unfamiliar with limits - it’s essentially the value a function forever approaches but doesn’t actually reach. From my math courses, I knew of a function that did this pretty well:
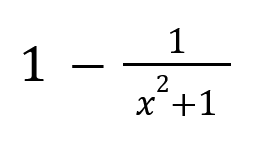
Now, the astute of you may already see what I did to arrive at the function above, but let me go through it regardless. The first thing to do would be to look at the graph:
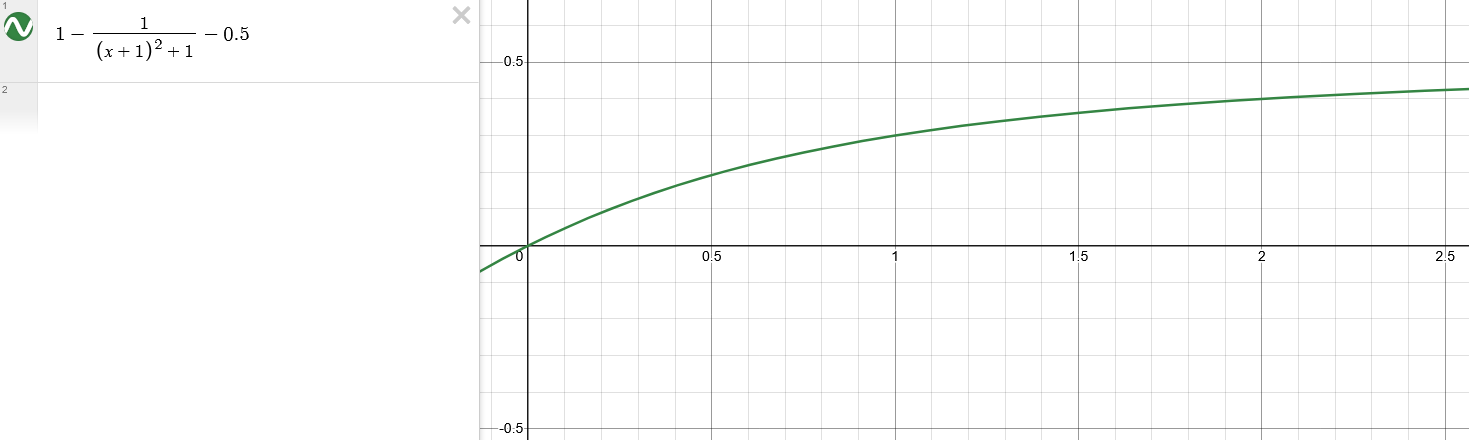
You can see a few problems already with this graph. The first one is that the initial scaling is slow, but ramps up before ramping down. Preferrably, you’d want faster initial scaling before reaching a falloff. The other issue is that you reach that falloff really quickly - at 6 resistance you’re already past blocking 90% of damage. Let’s fix the first part. You may remember transition laws from your algebra courses, but an easy solution is to have the start occur at the half-way point. We can offset the graph by one and then lower it by .5 to do this:
Now, to fix the scaling issue, we simply divide x by 250 to drag it out.
However, our previous transition caused a new issue. Since we lowered the graph by a half, the limit changed from 1 to 0.5. We simply need to multiply the whole thing by 2 to fix this issue. You can see how easily I came up with this abomination of a function. The summnation came in because we have to go through each damage type when taking damage.
Next Week!
Next week I’m working on status effects and buffs. I want to share a little thing for it because I want to showcase why C# is the best language. Status effects are best used through factory methods, and C# is very helpful creating generic abstract factory methods because of generic constraint. Look at this!
